If you want to learn how to fix WordPress maintenance mode, imagine this: you are editing your website and suddenly everything stops, and everything seems to be going well. Suddenly, you receive the very dull warning, “Briefly unavailable for scheduled maintenance.”
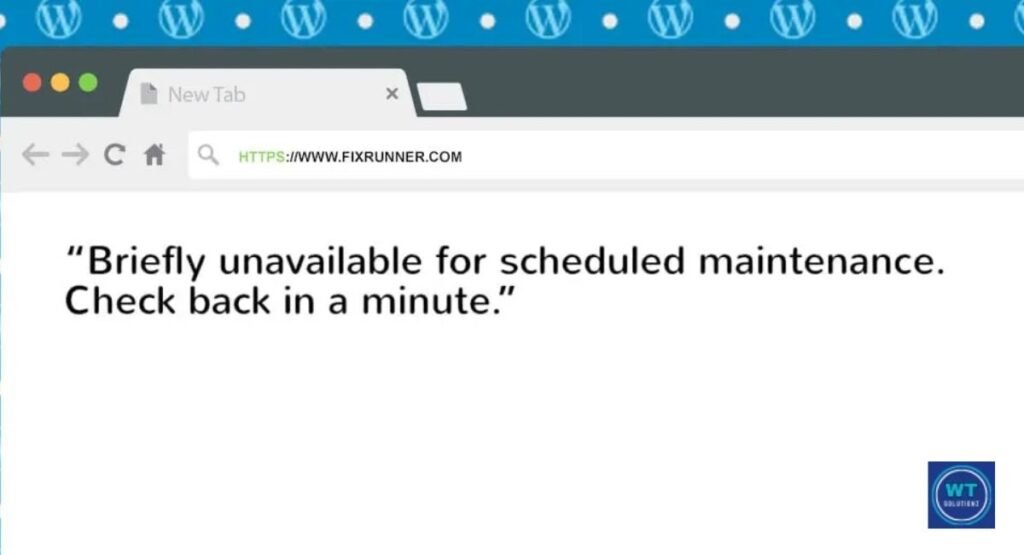
Check back in a moment. You know how annoying this can be? That “one minute” seems to go on forever as you wait and keep refreshing the page.
Your website appears stuck in a never-ending loop; visitors are greeted with a blank screen, and you are unable to access your dashboard.
But you haven’t done any harm, so there’s no reason to be alarmed! Think about using WordPress Maintenance Mode as a short-term security precaution.
WordPress essentially “locks” the doors to safely replace outdated files with new ones when you upgrade a plugin or theme.
This is a sensible precaution to prevent collisions, but occasionally the guard just forgets to unlock the door after doing the assignment.
What is the cause of this problem, then? Usually, it’s just bad timing. Maybe two plugins started to “conflict,” your internet connection failed, or your server grew overwhelmed and stopped working.
The result? That unsettling “White Screen” or an unloading website. Fortunately, you don’t need to be an expert programmer to fix this problem.
Restoring everything to its original form is actually as simple as finding and deleting one little file.
Here’s a useful recommendation before we move forward: Please make sure you have a full backup of your website.
I recognize the temptation to just fix the problem and go forward, but maintaining a backup is your best defense when making changes to internal files.
It just takes a minute of your time and will provide you with total peace of mind if something goes wrong. Being careful is always preferable to regretting it later!
Use dependable plugins like Duplicator or UpdraftPlus rather than merely considering a backup.
Before making any changes, you can use these tools to create a full snapshot of your website, which makes it simple to restore everything if something goes wrong.
Where is the Maintenance File in WordPress?
It’s time to locate the “troublemaker” file that is impeding your website now that we have generated our backup.
It’s only a little configuration work, so don’t worry, it’s not a secret.
You need to go to the “Root Directory” of your website to find this file. This is usually a folder called public_html or www, depending on your hosting company. This directory, which contains all of your important files, acts as the center of your website.
One small issue, though, is that this file is a little “shy.” It is categorized as a secret file since its name starts with a dot (.). Just follow these simple steps on your hosting dashboard to make it visible:
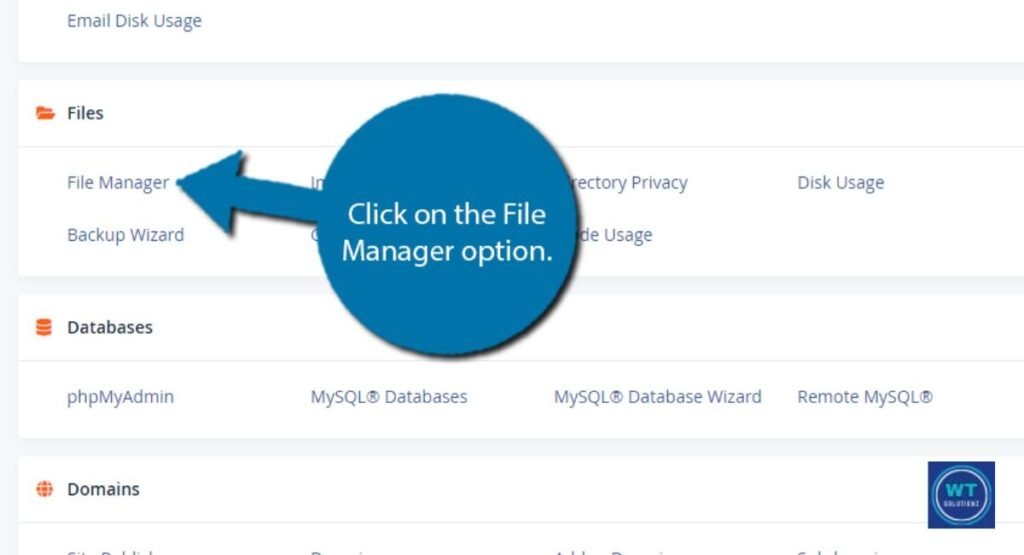
1. Open your File Manager or cPanel.
2. Search for the “Settings” button (usually located in the top-right corner).
3. Find the option labeled “Show Hidden Files (dotfiles).”
4. Click Save after checking that box.
The .maintenance file will then appear in your list.
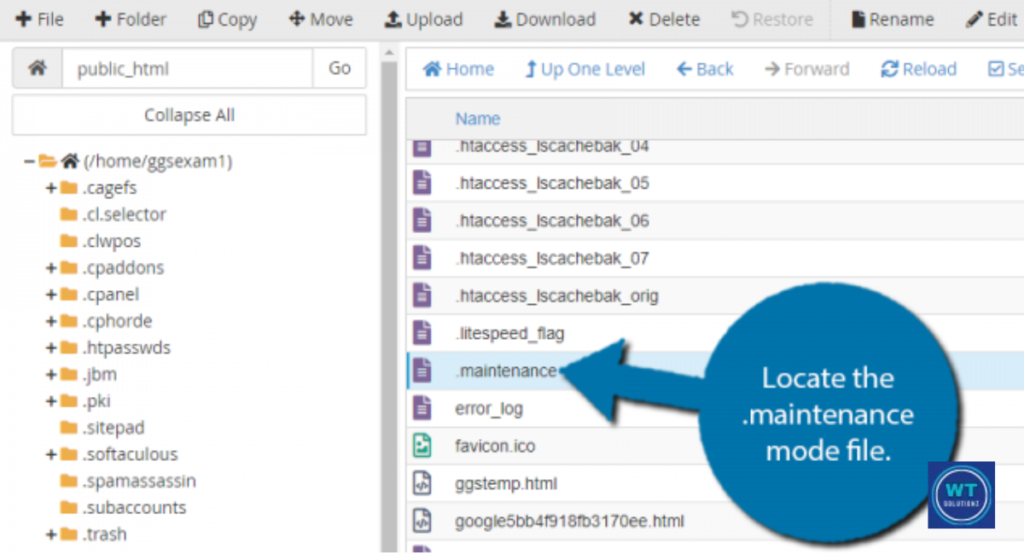
This is exactly what has been keeping your website from working!
How to Clear Maintenance in WordPress?
Method 1: The “Delete and Done” Method (cPanel/FTP)
The ‘File Manager’ is always available in your hosting control panel, regardless of whether you are using Hostinger, Bluehost, or SiteGround.
You may alternatively access and manage the internal files on your website using an FTP client like FileZilla for a more polished approach.
Because of its effectiveness and rapidity, this approach is the most popular one.
The next steps are simple once you’ve found the elusive .maintenance file in your public_html directory:
- Just perform a right-click on the .maintenance file.
- Choose Delete.
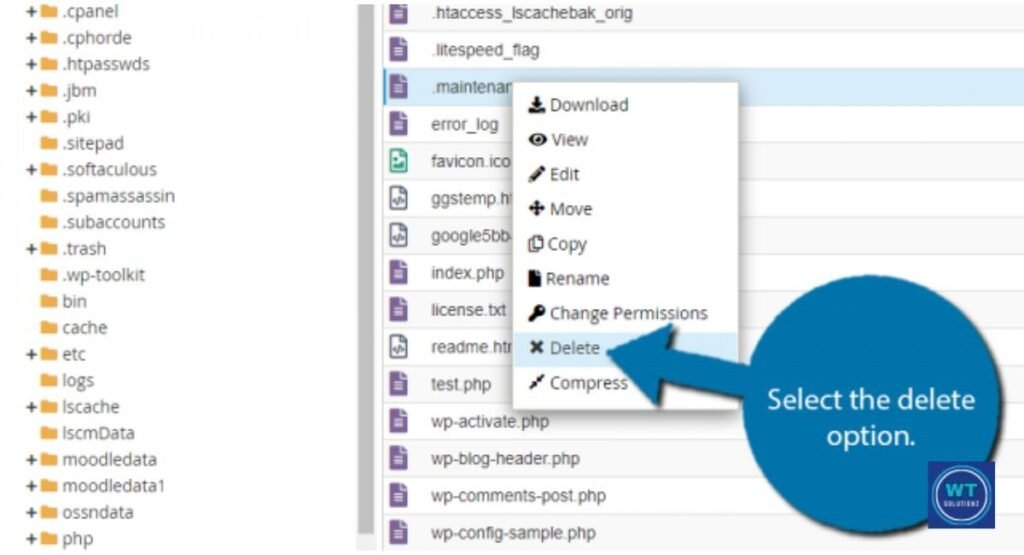
- Return to your website and select Refresh. Just like that! Your website should get back to normal right away. It’s similar to taking down a “Closed” sign at your store’s entrance.
Method 2: Check Your Plugins for Maintenance
Sometimes the “stuck” screen might not be a mistake; instead, it might just be a plugin working a little too well!
You might have just forgotten to flip the switch if you use programs like SeedProd, LightStart, or WP Maintenance Mode.
- If available, access your WordPress dashboard.
- Go to the settings for that particular plugin.
- Make sure the “Status” option is either “Off” or “Deactivated.” Clicking save will fix your website’s functionality if this was the issue!
Method 3: Tech Enthusiasts’ Command Line
This approach is designed for people who think they are adept with a keyboard and would rather use the “black box” (SSH).
It is the fastest method for completing the operation without a mouse.
Just go to the root directory of your website and run rm.maintenance. A quick hit of the Enter key will make the file disappear.
Simple, tidy, and unquestionably “hacker-chic.”
Fixing Maintenance Mode Caused by Plugins
You will need to use your FTP or File Manager to apply external methods if you are unable to access your website to disable a troublesome plugin.
This guide will help you with your research:
Step 1: The “Rename” Approach
Think of this as turning on the main switch.
- Go to the wp-content folder.
- Find the plugins folder.
- Use the right-click menu to rename it to plugins_old, for instance.
What has happened? When you change the name, WordPress can’t find your plugins, and it instantly deactivates them all.
You shouldn’t worry because your settings and data are still totally safe! At this moment, please try to access your WordPress dashboard. If it opens successfully, congratulations!
You’ve just verified that the problem stemmed from a plugin.
Step 2: Finding the “Villain”
We must now identify the particular plugin that is the source of the issue.
- Go back to your File Manager and change the folder’s name to plugins.
- Next, go to your WordPress dashboard’s Plugins area.
- Start turning on each plugin individually.
- When your website breaks or shows that maintenance error again, you’ll know exactly who your “culprit” is.
Now that you know what’s wrong, you can try a fresh reinstallation, uninstall it, or look for an alternative. The issue has been fixed!
Once the faulty plugin has been located, remove it and search for a better one.
A word of caution: Since GPL and Cracked (Nulled) plugins are frequently the main source of security flaws and maintenance issues, they should always be avoided.
Use Advanced Troubleshooting When the Simple Fix Fails
If the basic approaches fail, it is imperative to put these professional strategies into practice.
Despite their seeming complexity, they are actually rather straightforward.
1. Examine “wp-activate.php.”
This file works similarly to your website’s ignition switch. Sometimes a setting is trapped in the “on” position during an update.
- Go to the main site directory and open the wp-activate.php file.
- Look for a line of code that says define (‘WP_INSTALLING’, true); if it says true, just change it to false.
- Refresh the page once the file has been saved. “Hey, the installation is complete, you can proceed now!” is what this action tells WordPress.
2. Empty Your Cache
Sometimes your browser or server is “remembering” the out-of-date version, even though your website is operating properly.
- Try using Incognito or Private mode to view your website, or clear the cache in your browser.
- Make sure to clear the settings if you use a caching plugin, such as WP Rocket or W3 Total Cache. The maintenance page is often just kept in memory.
Don’t just clear your browser cache; if you use a plugin like LiteSpeed Cache, make sure to select ‘Purge All’ to clear server-side data.
Additionally, always check your site in Incognito Mode or on a mobile device to confirm the error is truly gone.
4. The Test of Theme Conflict
Your theme might be the problem if it wasn’t a plugin. Try the following if you recently changed your theme and the website crashed:
- Go to the wp-content or themes folder.
- Modify the folder name of your active theme.
- WordPress will immediately switch back to its default theme, like Twenty Twenty-Four. If your website is currently functional, it means that your theme has to be updated or fixed!
When troubleshooting, always try using a default WordPress theme, like Twenty Twenty-Five. If your website works well with the default theme, your previous theme is likely outdated or corrupted.
Prevention Tips (How to Avoid This Headache Next Time?)
While fixing the problem is good, avoiding it completely is much better! Here’s how to make sure your website runs smoothly and without any problems:
1. Refrain From Updating Everything at Once.
Clicking the “Update All” button and walking away could be tempting, but this is frequently where issues occur.
It’s like trying to fit ten people through a small doorway at once; someone will get stuck!
- Solution: Make individual plugin updates, and you will be able to pinpoint exactly which plugin is causing a conflict, even if it could take a few extra seconds.
2. Stay on the Page
When you click “Update,” a lot of “behind-the-scenes” work is being done on your website.
You risk interfering with the procedure in the middle if you dismiss the tab or reload the website too soon.
- Solution: Give it some time. Before continuing, wait until the “Update Successful” notification shows up. It can be rather helpful to have a little patience!
3. For Major Changes, Use a “Staging” Site
If you are making a big update, such as a big theme change or a big WordPress version upgrade, don’t do it on your live site where everyone can see the mayhem if something goes wrong.
- Solution: Using a staging environment. This is your website’s “playground” version. If everything looks perfect after testing the updates there, you can move them to your real website.
4. Manage Auto-Updates Reasonably
It is frequently tempting to leave things on autopilot for hefty or necessary plugins like WooCommerce. However, this is frequently the cause of websites becoming stuck in background processing maintenance mode.
If something goes slightly wrong, the entire vehicle stops in the middle of the road, much as when you let a robot fix your automobile while you’re driving!
- Solution: Disabling auto-updates for your most important plugins. Instead, manually update each one individually so you can keep an eye on the procedure. This easy action maintains your website functioning properly and avoids erratic background update loops.
See Also:
How Much Do WordPress Maintenance Plans Cost
How to Enable Maintenance Mode in WordPress
What is WordPress Maintenance Mode
FAQs
How long does WordPress’s maintenance mode last?
It usually takes one to two minutes for WordPress to finish updating. If the maintenance notification continues for an extended period of time, it means that there is a problem with the update process, and you will need to take action to fix it.
How can I turn off WordPress’s maintenance mode?
The easiest way is to open the File Manager on your website and delete the little file called maintenance from your main directory. Your website will instantly become operational again after this file is removed!
Can WordPress be put into maintenance mode by hand?
Yes, you can create a visually appealing “Coming Soon” page while you make updates by using plugins like LightStart or SeedProd. This method is considerably better than showing your visitors a malfunctioning website or a boring error notice.
Is the data on my website safe during this error?
Yes, it is completely safe! Similar to a “Closed” sign on a storefront, this error does not indicate that the store is broken or unoccupied. All of your settings, pictures, and posts are still there; all you need to do is “unlock” the door.
Summary
Getting stuck in WordPress Maintenance Mode’s difficult environment.
So this is only a small technical problem that can be readily fixed if you know where to look. It won’t seriously damage your website.
Just keep in mind the easy fix: locate the .maintenance file, remove it, and check your plugins if your website still seems a little strange. You may take back control and make your website accessible again with this simple procedure.
My final suggestion is to keep your website healthy by upgrading each plugin separately and creating regular backups. An enormous amount of worry in the future can be avoided with a little attention now. You can do this; get back to making something amazing!