Although it may be inconvenient, there are circumstances in which it is crucial to take your WordPress website offline. It is vital to prevent your visitors from encountering a broken or partially loaded site, whether you are updating a plugin, completing a server migration, or executing a comprehensive caching overhaul.
This is precisely the function of maintenance mode. It substitutes your active website with a clean, professional maintenance page that informs users of your imminent return. To ensure your website remains secure and your brand appears professional during significant updates, this article will guide you on how to enable maintenance mode in WordPress using both simple plugins and manual coding techniques.
What Is WordPress Maintenance Mode?
To put it simply, what does WordPress maintenance mode entail? This function temporarily hides your website from users by replacing it with a maintenance page. Instead of seeing an incomplete page or a broken layout, your visitors are greeted with a welcome message.
This message typically says, “We’re upgrading for you, be right back.” Even a built-in version of this feature is offered by WordPress. Every time WordPress does a core upgrade, an A.maintenance file is automatically generated in your public_html directory. A typical 503 Service Unavailable response is the outcome of this procedure. But what about that default screen?
It is rather simple, unbranded, and, to be honest, a little intimidating for beginners. Because of this, the majority of website owners choose a customized solution. A branded maintenance page communicates to your audience that you are organized, professional, and resilient.
Most novices are unaware of this. During an auto-update, WordPress’s built-in maintenance panel is only accessible for roughly ten minutes. WordPress then promptly removes the .maintenance file.
That file remains in place in the event of a server timeout, plugin conflict, update failure, or even a crash during the update. You are still unable to access your website. The 503 Service Unavailable wall is still visible to visitors. It’s no longer a feature.
That is an issue. The good news? You are in complete control. In just a few minutes, you can secure the production site, make a lovely, customized maintenance page, and provide administrators unrestricted access to the backstage area. You’ll learn just how from this guide.
When Should You Use WordPress Maintenance Mode?
Equally crucial to understanding how to configure it is the awareness of when to enable maintenance mode. In certain circumstances, it is not only wise but also essential to temporarily take your website offline.
The front end of your site may undergo brief disruptions due to executing a WordPress core update, transitioning to a new theme, optimizing your database, or finalizing a caching overhaul. Actual users encounter genuine issues in the absence of a maintenance page. This diminishes trust.
If you manage a WooCommerce store, it could even negatively impact your conversion rates. An appropriate holding page ensures that everything seems deliberate rather than malfunctioning.
It conveys professionalism. Your visitors value knowing that you are actively engaged in enhancements rather than disregarding your website.
However, not all tasks require maintenance mode. Composing a fresh blog entry? No. Installing one little plugin that has no impact on the front end? Most likely not. A fast guide for determining when to allow temporary site outages is provided in the table below.
| Situation | Use Maintenance Mode? |
| Major redesign or rebrand | Yes: Absolutely |
| WordPress core update | Yes: Recommended |
| Theme update or swap | Yes |
| Database optimization | Yes |
| Server migration | Yes: Essential |
| Security audit or malware removal | Yes |
| SSL certificate installation | Yes: Recommended |
| Writing or editing a blog post | Not needed |
| Installing a small plugin | Skip it |
| Changing a widget | Not necessary |
Another important factor to consider is the difference between maintenance mode and coming soon pages. Often, individuals mix up these two concepts. Newly launched websites ought to display a coming soon page.
Conversely, active websites that require brief downtimes should implement a maintenance page. Both categories utilize comparable tools. Each can include an email subscription form and a countdown timer. Nevertheless, they fulfill different functions at distinct phases of your website’s development. As you progress, remember to keep this distinction in mind.
Method 1: Enable Maintenance Mode Using a Plugin (Easiest Way)

Whether you are a developer or not, using a plugin is almost always the fastest way to put WordPress in maintenance mode. One-click activation, pre-made themes, subscription form integrations, and a drag-and-drop editor are examples of plugins. You don’t touch a single line of code.
For most WordPress users in 2026, this is the recommended course of action. It takes about five minutes to set up and looks far more professional than WordPress’s default maintenance interface. Furthermore, the best WordPress maintenance mode plugin will automatically handle the proper 503 Service Unavailable status code, which is crucial for search engine optimization. More on that later.
Furthermore, utilizing the plugin method provides non-technical website owners with total creative autonomy. Would you prefer your return date to be shown on a countdown timer?
Completed. To ensure you receive leads even during a short downtime, would you like to subscribe to an email service?
Simple: do you want your logo, brand colors, and headline to stand out? A freemium page builder plugin manages all of this. This approach encompasses four essential steps: selecting the appropriate plugin, installing it, setting up your page, and disabling it once you have finished.
Let us examine each step in detail:
Best Maintenance Mode Plugins for WordPress
Selecting the best maintenance mode plugin for WordPress in 2026 doesn’t have to be challenging. There aren’t many outstanding options available on the market, and they’re all geared toward slightly different markets.
Leading the way is SeedProd, a robust drag-and-drop editor with hundreds of templates, support for subscription forms, and deep WooCommerce integration. Another excellent choice is LightStart, which is lightweight, free, and ideal for novices.
Otter Blocks is an excellent option if you already use blocks for your projects, as it integrates well with the Gutenberg block editor. Please refer to this side-by-side comparison to help you make a decision.
| Plugin | Free Version | Drag & Drop | Email Capture | Gutenberg Support | Best For |
| SeedProd | Yes | Yes | Yes | Yes | All-around best pick |
| LightStart | Yes | Yes | Yes | Yes | Beginners, lightweight |
| Otter Blocks | Yes | Yes | Yes | Yes | Block editor users |
| WP Maintenance Mode | Yes | Yes | Yes | No | Simple setup |
| Maintenance by fruitfulcode | Yes | No | No | No | Minimalists |
In 2026, SeedProd stands as the top selection for most individuals. Featuring a complimentary tier that fulfills all the needs of small to medium-sized websites, it truly exemplifies a freemium page builder.
The premium version of SeedProd provides store-specific functionalities that justify the investment, particularly for those operating a WooCommerce store.
How to Install and Activate the Plugin
It takes less than two minutes to set up a free maintenance mode plugin like SeedProd.
A thorough tutorial on how to do this within your WordPress dashboard can be found below.
- Step 1) Log in to the WordPress admin panel.
- Step 2) Choose Plugins → Add New Plugin from the sidebar on the left.
- Step 3) Enter SeedProd into the search bar and hit Enter.
- Step 4) Click Install Now next to the SeedProd plugin listing.
- Step 5) After installation, click Activate.
- Step 6) A new SeedProd menu option appears in your sidebar. Press it.
- Step 7) Select SeedProd → Pages.
- Step 8) Find the Maintenance Mode option and activate it.
That’s it. Your maintenance page is now live for all non-admin visitors. Admins who are logged in can still browse the site freely, a crucial feature we’ll explain in the FAQ section.
Before you call it done, though, head into the drag-and-drop editor and actually design your page. A blank toggle with no customization gives visitors a generic experience.
Take five extra minutes to make it yours.
How to Configure Your Maintenance Page
Here’s where the fun starts. Setting up your WordPress maintenance page entails creating a brand-representative page rather than merely a gray holding page. Click Edit Page next to your Maintenance Mode toggle in SeedProd’s drag-and-drop editor.
A visual builder with pre-made themes arranged by category will greet you. Select one that complements the aesthetic of your brand and begin personalizing it. Add your logo. Change the title to something comforting and consoling, like “We’re making things better for you.”
Choose a backdrop color or submit a picture that is consistent with your brand. Add a countdown timer block if you know when you’ll be returning. It offers visitors something to anticipate and creates a sense of urgency.
Don’t overlook the subscription form. On a branded maintenance page, this feature is frequently neglected. Genuine visitors are coming in and then departing when your website is momentarily unavailable.
Before those leads permanently leave, an email registration form can grab them. Integrate it straight into SeedProd with your email marketing solution (like ActiveCampaign, ConvertKit, or Mailchimp). Add a succinct note like “Be the first to know when we’re back” and watch as your list grows with ease.
In order to allow visitors to interact with you on other platforms during the outage, think about including links to your social media accounts as well. Even in the event that your main website is offline, a well-designed holding page can effectively sell your business.
How to Deactivate Maintenance Mode After Work Is Done
It’s equally important to know how to turn off WordPress maintenance mode as it is to know how to turn it on. After completing your chores, go back to SeedProd → Pages and turn off the Maintenance Mode toggle. It’s simple. But don’t stop there.
To make sure users can access your website normally, open it in a private or incognito browser window. The embarrassing scenario of inadvertently leaving your maintenance page active for hours after your site has been fully restored is avoided with this extra step, which only takes 10 seconds.
Clearing your cache is another crucial step. Make sure to clear everything as soon as you turn off maintenance mode if you’re using a caching plugin like WP Rocket, W3 Total Cache, or WP Super Cache. If this step is missed, certain visitors, including Googlebot, may still see the out-of-date cached maintenance page.
Additionally, since many managed WordPress providers, such as WP Engine, Kinsta, and SiteGround, have their own server-level cache, make sure to check your hosting panel. Make sure you also clear that. All visitors and search engine crawlers should now be able to access your production site.
To make sure that no lingering crawl issues have surfaced during your outage, you should check Google Search Console again within a day.
Method 2: Enable Maintenance Mode Manually (Without Plugin)
Developers and experienced users who like simple, leaner configurations should utilize the WordPress maintenance mode without the plugin method. No additional plugin. No entries in the database. Simply said, raw code follows your instructions completely.
Although this approach offers you the greatest control, there is a greater chance that you may make a typo or modify the incorrect file. Make a complete backup of your website before making any changes. Use a backup tool from your hosting panel or a plugin such as UpdraftPlus.
Two tools are required after you’ve made a backup: an FTP client (FileZilla is the most often used) and a simple text editor such as Notepad++ or VS Code. If FTP isn’t working for you, you should also have access to the File Manager on your hosting.
Three distinct manual methods are covered in this section: the functions, the FTP-accessible .maintenance file, the .htaccess redirect technique for Apache server environments, and the .php method that makes use of a custom PHP function.
Every technique has a unique use case. With just one file needed and a completion time of seconds, the .maintenance file technique is the fastest. More control over user roles and messaging is available with the functions.php technique. The .htaccess method is most suitable when you wish to redirect users during maintenance to a fully customized HTML page.
Select the approach that best meets your requirements, or go over all three to learn more about the underlying mechanisms.
Using the .maintenance File via FTP
The .maintenance file method is the most direct way to trigger WordPress’s native maintenance screen. Open your FTP client; FileZilla is free and widely used. Connect to your server using the credentials provided by your host.
Once connected, navigate to your WordPress root directory, usually called public_html. Inside, create a new file and name it exactly .maintenance (with the dot at the start, no extension). Open it and paste this single line of PHP:
php
<?php $upgrading = time(); ?>
Once the file has been saved, upload it. That’s all. WordPress checks this file each time a page loads and instantly shows all users the 503 Service Unavailable maintenance screen. Administrators who are logged in automatically stay out of maintenance mode. Once your work is done, simply use FileZilla to reconnect, navigate to public_html, find the .maintenance file, and delete it. Your website instantly reverts to its initial state.
This method is elegant in its simplicity because it doesn’t require plugins, options panels, or database changes. One small file does one important function. The only disadvantage is that the default maintenance screen is completely unstyled. If branding is crucial to you, consider the functions or the plugin method. You will benefit more from the PHP approach.
Using functions.php to Enable Maintenance Mode
By utilizing the functions.php method, you can develop a personalized PHP function that enables your website to enter maintenance mode, accompanied by a message that you can fully customize.
Navigate to the functionalities of your child theme’s PHP file. It is essential to always use a child theme. Modifying the files of the parent theme will result in the loss of your changes whenever a theme update is performed. To access the file, use FileZilla, your hosting file manager, or the Appearance → Theme File Editor in WordPress. Insert this code at the end of the file:
php
function wp_maintenance_mode() {
if ( !current_user_can( ‘edit_themes’ ) || !is_user_logged_in() ) {
wp_die(
‘<h1>Under Maintenance</h1>
<p>We are upgrading our site for a better experience. Check back shortly!</p>’,
‘Maintenance Mode’,
array( ‘response’ => 503 )
);
}
}
add_action( ‘get_header’, ‘wp_maintenance_mode’ );
Here’s what each part does. The wp_maintenance_mode() function checks user roles; if the visitor isn’t a logged-in admin with theme editing rights, WordPress calls wp_die() and serves your custom message. The array( ‘response’ => 503 ) argument ensures the correct 503 Service Unavailable HTTP status code gets sent to Google. The add_action( ‘get_header’, ‘wp_maintenance_mode’ ) line hooks the function to fire on every page load. To disable it, simply remove or comment out these lines from your child theme‘s functions.php. Clean, effective, and completely plugin-free.
Using .htaccess for Maintenance Mode
The .htaccess technique, which functions within Apache server setups, directs all incoming traffic to a customized HTML maintenance page. This method makes use of RewriteEngine rules, the same technology that makes WordPress’s aesthetically pleasing permalinks possible.
Make a file called maintenance.html in your public_html directory to start. You may add your branding, a countdown timer, or a simple message to make it uniquely yours. The following lines should then be inserted close to the top of your .htaccess file, which is also found in public_html:
apache
RewriteEngine On
RewriteCond %{REQUEST_URI} !/maintenance.html$
RewriteCond %{REMOTE_ADDR} !^YOUR\.IP\.ADDRESS$
RewriteRule ^(.*)$ /maintenance.html [R=302,L]
Replace YOUR\.IP\.ADDRESS with your actual IP address. This is how you bypass maintenance mode as an admin and keep working on the site. Every other visitor gets a 302 redirect to your maintenance.html page. Why a 302 redirect and not a 301 redirect?
Because a 301 redirect is permanent. A 302 redirect tells Google it’s temporary, which is exactly what you want. Using a 307 redirect is also acceptable here and is the HTTP/1.1 equivalent of a 302 redirect. Always back up your .htaccess file before editing it. A single typo can take down your entire site and trigger the dreaded white screen of death.
How to Customize Your WordPress Maintenance Page
Many website owners miss a big opportunity when it comes to customizing the content of their WordPress maintenance page. Many people just keep the default screen and go to maintenance mode. On the other hand, your customized maintenance site is a valuable digital asset.
When visitors reach this page, they are in a sense of anticipation rather than being lost. A brief downtime can be turned into a significant marketing opportunity with a well-thought-out holding page. Make sure your brand colors and logo are visible, at the very least.
Include an approachable, human-centered headline. Make use of wording that acknowledges the inconvenience and thanks your guests for their patience. This small effort shows that the site is being managed by a sincere, compassionate crew.
Consider what your branded maintenance page may accomplish for your company’s objectives, going beyond simple branding. When you’re launching something new after the maintenance window, a countdown timer is particularly effective in building anticipation.
Leads are passively collected using an email registration or subscription form. Signing up visitors are warm leads that you would have lost entirely otherwise; they want to hear from you. To enable people to track your developments in real time, include links to your active social media platforms.
If you manage a WooCommerce store, think about including a message regarding delayed orders or a link to your customer service email. Make sure your maintenance page has all you need by using this design checklist.
| Element | Purpose | Priority |
| Logo | Brand recognition | Must-have |
| Headline copy | Set expectations | Must-have |
| Short explanation | Reduce anxiety | Must-have |
| Countdown timer | Show ETA, build anticipation | Highly recommended |
| Email signup/subscription form | Capture leads during downtime | Highly recommended |
| Social media links | Keep visitors engaged | Recommended |
| Background image or brand color | Visual polish | Recommended |
| Contact email or support link | Handle urgent queries | Optional |
| Progress indicator | Show update status | Optional |
Pro Tip: Run an A/B test on your maintenance page headline before your next big update window. Even a simple change, like “We’re upgrading for YOU” vs. “Back soon!” can significantly impact how visitors perceive the downtime.
WordPress Site Stuck in Maintenance Mode: How to Fix It
One of the most popular WordPress troubleshooting topics is fixing a website that is stuck in maintenance mode, and for good reason. It happens more frequently than one might think. Think about the following situation.
You start a set of plugin updates or a core upgrade for WordPress. Your internet connection breaks down in the process. Alternatively, a server timeout could occur with your hosting provider. Or maybe the update procedure is stopped in the middle by a lack of disk space. WordPress creates the .maintenance file at the start of the update, but it is unable to delete it since the update was unsuccessful.
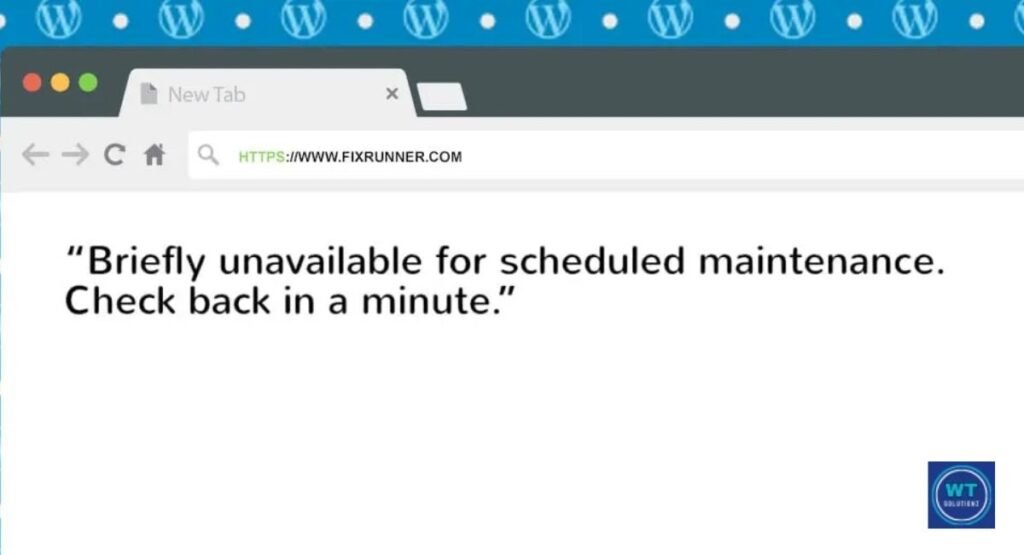
As a result, the 503 Service Unavailable error appears for every visitor. Additionally, you can see the well-known error message: “Briefly unavailable for scheduled maintenance. Check back in a minute.” This is the solution you require for the briefly unavailable scheduled maintenance issue.
The fix is straightforward, but you need server access to pull it off. Here’s the exact process.
- Step 1) Open FileZilla or your hosting control panel’s File Manager.
- Step 2) Connect to your server and navigate to your WordPress root directory (public_html).
- Step 3) Look for a file named .maintenance. Note: Some file managers hide files that start with a dot. Enable “show hidden files” if you don’t see it.
- Step 4) Right-click the .maintenance file and select Delete.
- Step 5) Refresh your site in a browser. It should be live again immediately.
After removing the file, if the website still shows the maintenance screen, check your hosting panel’s error logs. Corrupted files may have been left behind as a result of an unsuccessful plugin or theme upgrade.
Additionally, if one plugin was being installed at the time of the incident, you might be dealing with a plugin conflict. Rarely, instead of the typical maintenance screen, the accident may result in the white screen of death. In these situations, check your error logs, use File Manager or FileZilla to disable any previously updated plugins, and try restarting the update from a clean state.
If you are operating in a staging environment or on a staging site, always perform updates there first to identify these issues before they affect your production site.
Why Enable Maintenance Mode? Key Benefits

Enabling maintenance mode makes more sense than just covering up a broken page. Prioritize the guest experience. When someone visits your website in the middle of an update and notices that the theme is only partially rendered, the CSS is faulty, or there are missing graphics, they depart.
Even worse, they never return. That risk is eliminated with a neat, polished, branded maintenance site. It alerts guests to the fact that something deliberate is taking place. It safeguards your brand’s reputation while your website is at its most vulnerable.
This is particularly important for WooCommerce site owners, as a bad checkout experience can permanently erode client confidence. A holding page preserves the brand impression while eliminating that point of friction.
Every site owner must understand how maintenance mode affects SEO from a technical and SEO standpoint. An HTTP status code of 503 Service Unavailable should be returned by a maintenance page that is executed correctly.
Googlebot receives this particular signal, which says, “This is temporary.” Kindly come back later. Avoid de-indexing pages. For a short, well-publicized outage, Google will not penalize your ranks and acknowledge the 503 Service Unavailable answer.
On the other hand, Googlebot may face 404 errors, broken pages, and missing resources when crawling your website during an upgrade if maintenance mode is not used. It may take weeks to fully fix such crawl problems, which can appear in Google Search Console within hours. Utilizing a 302 redirect or a correct 503 Service Unavailable response can prevent all of these issues.
See Also:
How Much Do WordPress Maintenance Plans Cost
How to Fix WordPress Maintenance Mode
What is WordPress Maintenance Mode
FAQs
How to add a maintenance page in WordPress?
Install a plugin like SeedProd or LightStart, activate it, and toggle on the maintenance mode switch. Customize your page using the drag-and-drop editor and save. Alternatively, use the .maintenance file method via FileZilla for a code-based approach.
How to update maintenance mode in WordPress?
If you’re using SeedProd, go to the plugin’s settings page, toggle the switch off, make your updates, then toggle it back on. For the functions.php method, comment out the function temporarily and uncomment it when you’re back in maintenance.
Does maintenance mode affect SEO?
Maintenance mode SEO impact is minimal when done correctly. A proper 503 Service Unavailable response tells Google the downtime is temporary, so your rankings stay intact. Avoid using a 301 redirect to your maintenance page, which signals a permanent move and can deindex pages.
Can the admin still access the site during maintenance mode?
Yes, admin access during maintenance mode is preserved by default in most plugin-based and code-based methods. In the functions.php approach, logged-in admins with sufficient user roles browse freely. In the .htaccess method, you bypass maintenance mode by whitelisting your IP address inside the RewriteEngine rule.
Summarize
Enabling maintenance mode in WordPress doesn’t have to be complicated, and in 2026, you’ve got more options than ever to do it beautifully. Whether you choose the simplicity of SeedProd’s drag-and-drop editor, the directness of the .maintenance file via FileZilla, the precision of a custom PHP function in functions.php, or the control of a RewriteEngine rule in .htaccess, there’s a method that fits your skill level and your site’s needs.
The important thing is that you use it. Every WordPress core update, every theme update, every database optimization, or server migration deserves a clean, professional, branded maintenance page in front of it. Your visitors deserve better than a broken screen. Your brand deserves better than an accidental white screen of death. And your SEO deserves the safety net of a correct 503 Service Unavailable response.
Have questions or a method that worked brilliantly for you? Drop it in the comments; we’d genuinely love to hear from you.